flutter
flutter 네이버 로그인 구현
이나주니
2024. 12. 5. 15:33
반응형
https://pub.dev/packages/flutter_naver_login/versions/1.8.0
flutter_naver_login 1.8.0 | Flutter package
A Flutter plugin for using the native Naver Login SDKs on Android and iOS.
pub.dev
안드로이드
https://developers.naver.com/apps/#/register
애플리케이션 - NAVER Developers
developers.naver.com
네이버 개발자 센터 접속후 애플리케이션 등록 하기
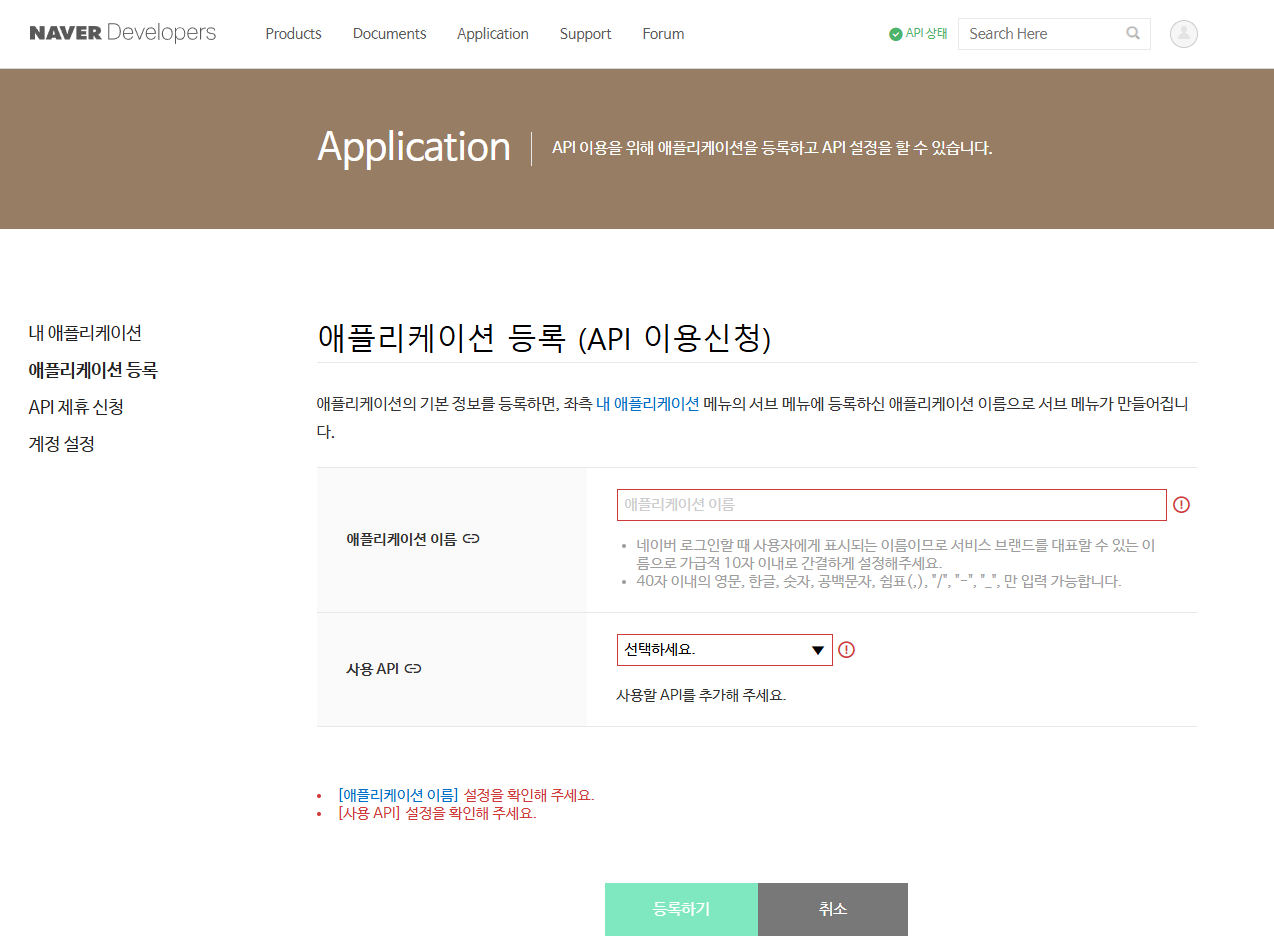
원하는 API 설정

작업할 os설절

정보 셋팅
아직 개발 단계인 경우 임의적인 URL 넣기
※ 앱이 정상 배포되면 추후 URL 수정 필요

안드로이드 설정
res/value/style.xml

    <string name="client_id">client_id</string>
    <string name="client_secret">client_secret</string>
    <string name="client_name">앱이름</string>
AndroidManifest.xml
        <!-- 네이버 -->
        <meta-data
            android:name="com.naver.sdk.clientId"
            android:value="@string/client_id" />
        <meta-data
            android:name="com.naver.sdk.clientSecret"
            android:value="@string/client_secret" />
        <meta-data
            android:name="com.naver.sdk.clientName"
            android:value="@string/client_name" />
위 내용 입력
설정 끝
IOS
AppDelegate
import UIKit

import Flutter

import NaverThirdPartyLogin


@main

@objc class AppDelegate: FlutterAppDelegate {

  override func application(

    _ application: UIApplication,

    didFinishLaunchingWithOptions launchOptions: [UIApplication.LaunchOptionsKey: Any]?

  ) -> Bool {

    GeneratedPluginRegistrant.register(with: self)


    NaverThirdPartyLoginConnection.getSharedInstance()?.isNaverAppOauthEnable = true

    NaverThirdPartyLoginConnection.getSharedInstance()?.isInAppOauthEnable = true


    let thirdConn = NaverThirdPartyLoginConnection.getSharedInstance()

    // 네이버 앱으로 인증하는 방식 활성화

    thirdConn?.isNaverAppOauthEnable = true


    // SafariViewController에서 인증하는 방식 활성화

    thirdConn?.isInAppOauthEnable = true


    // 인증 화면을 아이폰의 세로모드에서만 적용

    thirdConn?.isOnlyPortraitSupportedInIphone()

    thirdConn?.serviceUrlScheme = "serviceUrlScheme"

    thirdConn?.consumerKey = "consumerKey"

    thirdConn?.consumerSecret = "consumerSecret"

    thirdConn?.appName = "appName"

    return super.application(application, didFinishLaunchingWithOptions: launchOptions)

  }


  override func application(_ app: UIApplication, open url: URL, options: [UIApplication.OpenURLOptionsKey: Any] = [:]) -> Bool {

      var applicationResult = false

      if !applicationResult {

         applicationResult = NaverThirdPartyLoginConnection.getSharedInstance().application(app, open: url, options: options)

      }

      // if you use other application url process, please add code here.


      if !applicationResult {

         applicationResult = super.application(app, open: url, options: options)

      }

      return applicationResult

  }

}
위 처럼 내용셋팅
이후
info에 값 셋팅
<?xml version="1.0" encoding="UTF-8"?>
<!DOCTYPE plist PUBLIC "-//Apple//DTD PLIST 1.0//EN" "http://www.apple.com/DTDs/PropertyList-1.0.dtd">
<plist version="1.0">
				<!-- other codes -->
        <key>CFBundleURLTypes</key>
        <array>
            <dict>
                <key>CFBundleTypeRole</key>
                <string>Editor</string>
                <key>CFBundleURLSchemes</key>
                <array>
                    <string>[UrlScheme]</string>
                </array>
            </dict>
        </array>

        <key>LSApplicationQueriesSchemes</key>
        <array>
            <string>naversearchapp</string>
            <string>naversearchthirdlogin</string>
        </array>
        <key>naverServiceAppUrlScheme</key>
        <string>[UrlScheme]</string>
        <key>naverConsumerKey</key>
        <string>[ConsumerKey]</string>
        <key>naverConsumerSecret</key>
        <string>[ConsumerSecret]</string>
        <key>naverServiceAppName</key>
        <string>[ServiceAppName]</string>

        <!-- http allows configurations -->
        <key>NSAppTransportSecurity</key>
        <dict>
           <key>NSAllowsArbitraryLoads</key>
           <true/>
           <key>NSExceptionDomains</key>
           <dict>
              <key>naver.com</key>
              <dict>
                 <key>NSExceptionRequiresForwardSecrecy</key>
                 <false/>
                 <key>NSIncludesSubdomains</key>
                 <true/>
              </dict>
              <key>naver.net</key>
              <dict>
                 <key>NSExceptionRequiresForwardSecrecy</key>
                 <false/>
                 <key>NSIncludesSubdomains</key>
                 <true/>
              </dict>
           </dict>
        </dict>
    </dict>
</plist>
이후 pod update
※ 테스터 ID 등록(최대 20개)
테스터들만 로그인 가능
정상 앱 정상 배포 후

검수 요청 진행
간편 로그인 프로세스

반응형